
Saturday, May 31, 2025
Friday, May 30, 2025
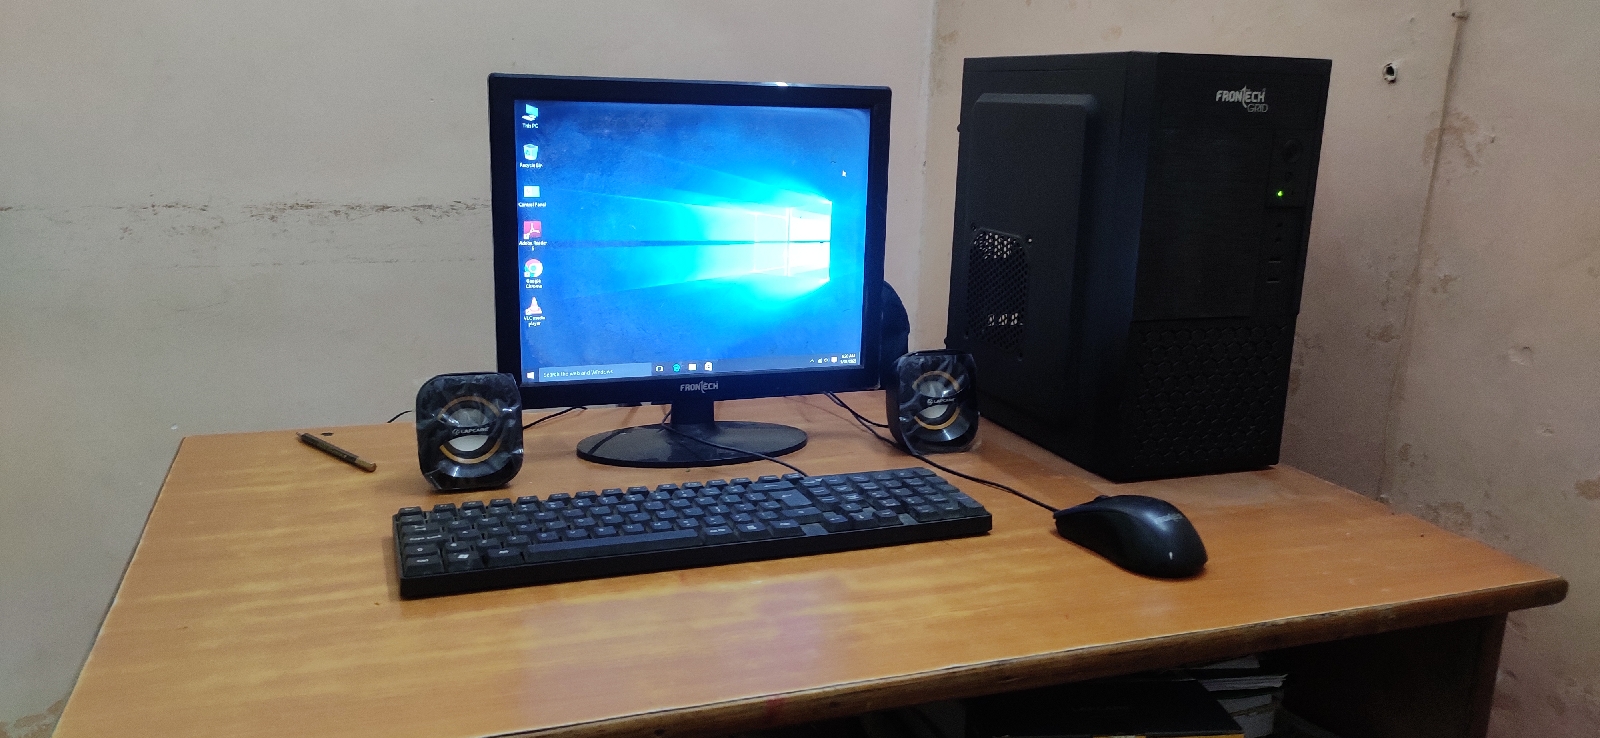
Components of windows 11 Desktop
Windows 11 introduces a sleek and modern desktop interface with updated visuals and improved usability. Below is a detailed breakdown of the main components of the Windows 11 desktop:
🖥️ 1. Desktop Background (Wallpaper)
- The desktop background is the image or color that appears behind all other elements.
- Users can personalize this with:
- Static images
- Slideshows
- Solid colors
- Windows Themes (which may include sounds and cursor styles)
📂 2. Desktop Icons
- Icons are small graphical representations of files, folders, apps, or shortcuts.
- Common default icons:
- Recycle Bin – Stores deleted files temporarily.
- This PC – Provides access to drives and storage devices.
- Network – Shows available networks.
- User’s Files – Quick access to documents, downloads, etc.
- Users can add or remove desktop icons via Settings > Personalization > Themes > Desktop icon settings.
🟦 3. Taskbar
The taskbar is the horizontal bar at the bottom of the screen. In Windows 11, it is center-aligned by default (can be left-aligned via settings).
Components of the Taskbar:
- Start Button 🪟 – Opens the Start Menu.
- Pinned Apps – Frequently used apps pinned for easy access.
- Task View Button 🗂️ – Allows you to view and manage multiple desktops and open windows.
- Search Button 🔍 – Opens Windows Search to find files, apps, or settings.
- Widgets Button 📰 – Shows personalized info like weather, news, calendar.
- System Tray (Notification Area) – Shows background apps, battery, volume, network, and clock.
- Action Center – Combines quick settings (like Wi-Fi, Bluetooth) and notifications (click clock or swipe in from the right).
- Show Desktop Button (far right corner) – Minimizes all windows to show the desktop.
🧰 4. Start Menu
- Redesigned with a simplified, centered layout.
- Top area: Pinned apps
- Middle area: Recommended files and recently used apps
- Bottom area: Account options, power button, and All Apps menu
- No more Live Tiles (unlike Windows 10)
🗂️ 5. File Explorer
- Accessed via the taskbar or Start Menu.
- Lets you browse, manage, and organize your files and folders.
- Features include Quick Access, OneDrive integration, and a new command bar.
🖼️ 6. Widgets Panel
- A personalized feed of widgets including weather, sports, stocks, news, calendar, etc.
- Opens via the taskbar or swiping from the left edge of a touchscreen.
- Requires Microsoft account for full personalization.
🖱️ 7. Snap Layouts and Snap Groups
- Hover over the maximize button to arrange windows into layouts.
- Snap Groups help switch back to your grouped apps easily.
- Improves multitasking and window organization.
🖥️ 8. Virtual Desktops
- Access via Task View or Win + Tab.
- Allows creation of multiple desktops for different tasks or projects.
- Each virtual desktop can have its own open apps and background.
🔊 9. System Tray / Notification Area
- On the bottom-right corner of the taskbar.
- Displays background apps, system alerts, volume, network, battery, and time/date.
- Expand button (˄) shows hidden icons.
🔔 10. Notification Center & Quick Settings
- Access by clicking the clock or using Win + A.
- Combines:
- Notifications
- Quick toggles for Wi-Fi, Bluetooth, brightness, volume, battery saver, etc.
- Customize via Settings > System > Notifications.
⚙️ 11. Settings App
- Central hub for configuring the system: display, network, personalization, accounts, updates, etc.
- Redesigned in Windows 11 for a more intuitive layout.
- Open via Start > Settings or Win + I.
🧑💻 12. Context Menu (Right-Click Menu)
- Right-clicking on desktop or files opens a context menu with options like:
- View
- Sort by
- Refresh
- Display settings
- Personalize
- Streamlined in Windows 11 with icons and a modern look.
- Legacy context menu available via “Show more options” (Shift + Right Click).
🌐 13. Microsoft Edge & Web Integration
- Microsoft Edge is the default browser, integrated deeply with Windows 11.
- Web apps can be pinned to Start or taskbar and run like native apps.
Components of Windows 10 Desktop
Windows 10 Desktop is the main user interface you see after logging in. It serves as the starting point for accessing applications, files, and settings. Here are the main components of the Windows 10 Desktop, explained in detail:
🖥️ 1. Desktop Background (Wallpaper)
- The large area you see after logging in.
- Can display images, solid colors, or slideshows.
- You can personalize it by right-clicking on the desktop → Personalize.
🗂️ 2. Icons
- Small graphical representations of files, folders, applications, and shortcuts.
- Common default icons:
- This PC – shows system drives and connected storage.
- Recycle Bin – stores deleted files temporarily.
- Network – displays connected networks and devices.
- User’s Files – opens the user's folders (Documents, Pictures, etc.).
📁 3. Taskbar
Located at the bottom of the screen by default, it includes:
a. Start Button
- Located at the far left.
- Opens the Start Menu, which provides access to apps, settings, power options, and more.
b. Search Box / Cortana
- Used to search files, apps, settings, or the web.
- Cortana may also appear here as a voice assistant (in supported regions).
c. Task View Button
- Shows all open windows and allows switching between them.
- You can also add and manage Virtual Desktops here.
d. Pinned Apps / Open Windows
- Icons of apps that are pinned for quick access or currently running.
- Right-click to pin/unpin or manage.
e. System Tray (Notification Area)
- Located at the right end.
- Shows background apps and system icons like:
- Volume
- Battery
- Wi-Fi/Ethernet
- Bluetooth
- Notifications
- Clock
f. Show Desktop Button
- A small hidden button at the far-right end of the taskbar.
- Clicking it minimizes all open windows to show the desktop.
🪟 4. Start Menu
- A hybrid of the classic menu and modern live tiles.
- Divided into:
- Left Panel: Frequently used apps, power options, settings.
- Right Panel: Live tiles showing apps like Mail, Weather, News, etc.
📌 5. Action Center (Notification Center)
- Opens from the right side by clicking the notification icon in the system tray.
- Shows system and app notifications.
- Offers Quick Actions like:
- Wi-Fi toggle
- Night light
- Bluetooth
- Airplane mode
- Brightness and other quick settings
🪟 6. Windows Explorer (File Explorer)
- Tool to browse files and folders on your system.
- Can be opened via "This PC" icon or taskbar.
- Main components inside File Explorer:
- Navigation Pane (left side)
- Address Bar (shows folder path)
- Ribbon Toolbar (actions like copy/paste/view)
- File/Folder View Area
🧰 7. Control Panel / Settings App
- Settings App: Modern UI to adjust system preferences (display, accounts, privacy, etc.).
- Control Panel: Legacy tool for more advanced configurations (still available).
🖱️ 8. Right-Click Context Menu
- Right-clicking on desktop or icons shows a menu with context-specific options like:
- Refresh
- View
- Sort
- Display settings
- New → File/Folder
🖼️ 9. Desktop Gadgets (Obsolete but available via 3rd-party apps)
- Windows 10 doesn't support traditional desktop gadgets like Windows 7.
- However, similar widgets can be added via third-party apps (e.g., Rainmeter).
Components of windows 7 Desktop
The Windows 7 Desktop is the first screen you see after logging into your Windows 7 account. It serves as the main interface for users to access programs, files, and settings. Here are the main components of the Windows 7 Desktop, explained in detail:
🖥️ 1. Desktop Background (Wallpaper)
- Definition: The image or solid color displayed on the Desktop.
- Purpose: Customizes the appearance of the Desktop and can provide a calming or productive environment.
- How to Change: Right-click on the Desktop → Personalize → Desktop Background.
🗂️ 2. Icons
- Definition: Small graphical representations of programs, files, folders, or system locations (e.g., "My Computer", "Recycle Bin").
- Types of Icons:
- Shortcut Icons: Have a small arrow and point to a file or application.
- System Icons: Like “Computer”, “Recycle Bin”, “Control Panel”.
- User-created Icons: Represent folders, files, or apps added by the user.
🧭 3. Taskbar
- Location: Usually at the bottom of the screen (can be moved).
- Components:
- Start Button (left corner): Opens the Start Menu.
- Pinned Applications: Frequently used programs placed on the taskbar.
- Active Applications: Shows currently running applications.
- System Tray / Notification Area (right corner): Displays background applications, volume, network, battery, and system notifications.
- Clock and Date: Shows current time and date.
🔍 4. Start Menu
- Access: Click the Start Button (Windows logo).
- Contents:
- Search Bar: Quickly finds files, folders, and applications.
- All Programs: List of installed programs.
- Recent Items: Recently used files.
- User Account Picture: Opens user account settings.
- Shutdown / Restart / Sleep options.
📂 5. Gadgets (Discontinued in later versions)
- Definition: Small applications that provide information at a glance (e.g., clock, calendar, weather).
- Access: Right-click on Desktop → Gadgets.
- Note: Microsoft discontinued gadgets due to security concerns.
♻️ 6. Recycle Bin
- Function: Temporarily stores deleted files.
- Restore or Permanently Delete: You can restore accidentally deleted files or empty the Recycle Bin to free up space.
📋 7. Windows Sidebar (in Vista, limited in Windows 7)
- Though not a major component in Windows 7 like in Vista, some users enable a sidebar-like gadget column on the right side of the Desktop.
🧮 8. Aero Peek (Show Desktop)
- Button at the far right of the taskbar.
- Hover or Click: Minimizes all windows to show the Desktop.
🪟 9. Windows (Open Program Windows)
- Programs open in rectangular windows that can be minimized, maximized, resized, or closed.
- Title Bar, Menu Bar, Scroll Bars, and Status Bars are common in application windows.
Summary Table
| Component | Description |
|---|---|
| Desktop Background | The wallpaper/image displayed |
| Icons | Shortcuts to programs/files |
| Taskbar | Bottom bar with start, apps, time |
| Start Menu | Central hub to access programs/settings |
| Gadgets | Mini-apps like clock, weather |
| Recycle Bin | Stores deleted files |
| Aero Peek | Button to show the desktop |
| Open Windows | Active program windows |
How can Change Wallpaper
Here are general steps to change the wallpaper on different devices and operating systems:
Windows 10/11
- Right-click on the desktop.
- Select Personalize.
- In the Background section, choose:
- Picture: Browse for an image.
- Solid color: Pick a color.
- Slideshow: Choose a folder of images.
- Adjust Fit (Fill, Fit, Stretch, etc.) if needed.
- Close the settings — the wallpaper will change automatically.
macOS
- Click the Apple Menu → System Settings (or System Preferences).
- Go to Wallpaper or Desktop & Screen Saver.
- Select a wallpaper from Apple’s collection or click + to add your own image.
- It updates immediately after selection.
Android
- Tap and hold on the home screen.
- Tap Wallpaper & style (may vary by phone brand).
- Choose from:
- Pre-installed wallpapers
- Gallery/Photos
- Set wallpaper for:
- Home screen
- Lock screen
- Or both
- Tap Set wallpaper.
iPhone (iOS 16 and above)
- Open Settings → Wallpaper.
- Tap Add New Wallpaper.
- Choose a wallpaper from:
- Photos
- Emoji
- Weather, etc.
- Tap Add, then choose to set it for Home Screen, Lock Screen, or both.
Thursday, May 29, 2025
Common Desktop Operation
Here are some common desktop operations that users typically perform on a desktop computer, regardless of the operating system (e.g., Windows, macOS, or Linux):
🖱️ Basic File Operations
- Create, rename, delete files or folders
- Copy, cut, and paste files or folders
- Move files between locations
- Search for files or folders
- Open and close files or applications
🖥️ Desktop & Window Management
- Switch between open windows or applications (e.g., Alt + Tab on Windows, Command + Tab on macOS)
- Minimize, maximize, resize, or close windows
- Arrange windows (side-by-side, stacked, etc.)
- Customize desktop background and themes
📂 File Explorer / Finder Use
- Navigate through directories/folders
- Use context menus (right-click options)
- View files in different layouts (list, icons, details)
- Sort files by name, size, date modified, etc.
⌨️ Keyboard Shortcuts
- Ctrl + C / V / X / Z – Copy, paste, cut, undo
- Ctrl + S / P / A – Save, print, select all
- Alt + F4 – Close window (Windows)
- Command + Q – Quit app (macOS)
🔧 System Settings and Customization
- Change screen resolution, display settings
- Adjust volume, brightness
- Set up Wi-Fi, Bluetooth
- Manage user accounts and passwords
🔒 Security & Maintenance
- Install updates
- Use antivirus or security software
- Backup files
- Empty recycle bin / trash
🌐 Internet & Network
- Connect to Wi-Fi
- Use a web browser (Chrome, Edge, Firefox, Safari)
- Download and upload files
- Use email clients or cloud storage
🖨️ Peripheral Device Management
- Set up and manage printers, scanners
- Use external drives (USB, HDD)
- Configure input devices (keyboard, mouse)
Windows 10 - An Operating System
Windows 10 is made up of several key components that together create a functional, user-friendly, and versatile operating system. Here’s a breakdown of the main components:
1. User Interface (UI)
- Start Menu: Central access point for apps, settings, and power options.
- Taskbar: Displays open apps, system notifications, and the system clock.
- Desktop: The main workspace with icons, shortcuts, and files.
- Action Center (Notifications): Shows system and app notifications, quick settings.
- File Explorer: Used for navigating files, folders, and drives.
2. Core System Components
- Kernel: The core of the OS managing hardware resources and system processes.
- Device Drivers: Interface between the OS and hardware devices (printers, graphics cards, etc.).
- Windows API: Set of programming interfaces for app development and system interaction.
3. System Services
- Windows Update: Manages updates for the OS and Microsoft software.
- Windows Defender / Security Center: Built-in antivirus and security tools.
- Task Scheduler: Automates tasks based on triggers or time.
- Event Viewer: Logs system, security, and application events.
4. Settings & Configuration
- Settings App: Modern interface for configuring the system (network, devices, personalization).
- Control Panel: Legacy interface for detailed and advanced system settings.
5. Applications and Tools
- Microsoft Edge: Default web browser.
- Cortana: Voice-based digital assistant (limited in recent versions).
- Snipping Tool / Snip & Sketch: Screenshot and annotation tools.
- Paint, Calculator, Notepad: Basic utility apps.
- Windows Store (Microsoft Store): Source for downloading apps.
6. File System
- NTFS: Default file system for managing files and folders.
- Libraries: Virtual folders that aggregate content from multiple locations.
7. Security Features
- BitLocker: Disk encryption feature (Pro and Enterprise editions).
- User Account Control (UAC): Prevents unauthorized system changes.
- Windows Firewall: Manages network traffic rules.
8. Networking and Connectivity
- Wi-Fi and Ethernet Support: For internet and network access.
- Bluetooth Support: For connecting wireless devices.
- HomeGroup (removed in newer versions): Simplified home network sharing.
9. Virtualization & Performance
- Task Manager: Monitors apps, processes, performance, and startup programs.
- Virtual Desktops: Allows multiple desktop workspaces.
- Hyper-V: Built-in virtualization (Pro and Enterprise editions).
10. Backup and Recovery
- System Restore: Restores system to an earlier state.
- File History: Backs up personal files.
- Recovery Environment: Tools for repairing the OS if it becomes unbootable.
Procedure for Starting a Computer
Procedure for starting a computer:
🖥️ Procedure for Starting a Computer
-
Ensure Power Supply
- Make sure the computer is plugged into a power source.
- Ensure the power switch on the power strip or wall socket is turned on.
-
Turn On Peripherals (if any)
- Switch on external devices like the monitor, printer, speakers, etc., if not powered through the computer.
-
Press the Power Button
- Press the power button on the CPU (for desktops) or on the laptop keyboard area.
- You may see indicator lights or hear fans start running.
-
Wait for the Boot Process
- The system performs a POST (Power-On Self-Test) to check hardware.
- The manufacturer's logo or boot screen will appear.
-
Operating System Loads
- The OS (e.g., Windows, macOS, Linux) will start loading.
- This may take a few seconds to a couple of minutes depending on the system.
-
Login to the System
- If user accounts are set up, you’ll be prompted to enter a username and password or use biometric login.
-
Desktop Loads
- After logging in, the desktop or home screen will appear.
- The computer is now ready for use.
📝 Tips:
- If the system doesn't start, check cables, battery (for laptops), and try again.
- For first-time use, there may be setup prompts (language, Wi-Fi, accounts).
Function of an Operating System
The function of an operating system (OS) is to act as an intermediary between users and computer hardware. It manages hardware and software resources and provides common services for computer programs.
Here are the main functions of an operating system:
1. Process Management
- Handles creation, scheduling, and termination of processes.
- Allocates CPU time to processes.
- Ensures multitasking and proper synchronization between processes.
2. Memory Management
- Manages the system’s primary memory (RAM).
- Keeps track of each byte in memory (who owns it, what it contains).
- Allocates and deallocates memory as needed.
3. File System Management
- Controls the creation, deletion, reading, and writing of files.
- Organizes files into directories for easy access.
- Manages permissions and storage access.
4. Device Management
- Manages input/output devices such as keyboards, mice, printers, and disks.
- Uses drivers to communicate with hardware.
- Handles buffering, caching, and spooling.
5. User Interface
- Provides a user interface (CLI or GUI) for interaction.
- Allows users to launch programs and manage files.
6. Security and Access Control
- Protects system resources and data from unauthorized access.
- Provides authentication and authorization.
7. Resource Allocation
- Ensures efficient allocation of CPU, memory, and I/O devices to multiple programs and users.
8. Networking
- Manages communication between computers via networking protocols.
- Supports internet access and data sharing.
In short, the OS is essential for ensuring a computer functions smoothly, efficiently, and securely.
Types of operating system
Operating systems (OS) are software that manage computer hardware and software resources and provide services for computer programs. There are several types of operating systems, classified based on how they operate and what they are designed for. Here's a breakdown of the main types:
1. Batch Operating System
- Description: Executes batches of jobs with minimal or no interaction from the user.
- Example: IBM OS/360
- Used In: Early computers; large-scale data processing
2. Time-Sharing (Multitasking) Operating System
- Description: Allows multiple users to use the system simultaneously by sharing CPU time.
- Example: UNIX, Windows 10
- Used In: General-purpose computing environments
3. Distributed Operating System
- Description: Manages a group of distinct computers and makes them appear as a single system.
- Example: Amoeba, LOCUS
- Used In: Networked systems, cluster computing
4. Network Operating System
- Description: Provides services to computers connected over a network.
- Example: Microsoft Windows Server, Novell NetWare
- Used In: File sharing, printer access, network resource management
5. Real-Time Operating System (RTOS)
- Description: Responds to input instantly, used where time is critical.
- Example: VxWorks, RTLinux
- Used In: Embedded systems, robotics, medical devices
6. Mobile Operating System
- Description: Designed for smartphones, tablets, and wearable devices.
- Example: Android, iOS
- Used In: Mobile and handheld devices
7. Embedded Operating System
- Description: Designed for embedded systems with limited resources.
- Example: FreeRTOS, QNX
- Used In: Appliances, cars, industrial machines
8. Multi-user and Single-user Operating Systems
- Multi-user: Multiple users can use the system simultaneously (e.g., UNIX).
- Single-user: Designed for one user at a time (e.g., Windows 11 Home).
9. Multiprocessing Operating System
- Description: Supports two or more processors running programs at the same time.
- Example: Windows Server, Linux SMP
- Used In: High-performance computing environments
10. Command-Line Interface (CLI) and Graphical User Interface (GUI) OS
- CLI OS: User interacts via typed commands (e.g., MS-DOS).
- GUI OS: User interacts through graphical icons (e.g., macOS, Windows).
Tuesday, May 27, 2025
Computer Motherboard
A computer motherboard (also called the mainboard or system board) is the central printed circuit board (PCB) in a computer. It connects and allows communication between many of the crucial components of a system, including:
Key Components on a Motherboard:
- CPU Socket – Holds the processor (CPU) and connects it to the rest of the system.
- RAM Slots (DIMM slots) – For installing memory (RAM).
- Chipset – Controls communication between CPU, RAM, storage, and peripherals.
- Storage Connectors – SATA or M.2 slots for SSDs and HDDs.
- Expansion Slots (PCIe) – For graphics cards, sound cards, network cards, etc.
- Power Connectors – To supply power from the PSU (Power Supply Unit).
- USB Ports & Headers – Internal and external USB connections.
- Audio and Network Ports – On the rear I/O panel.
- BIOS/UEFI Chip – Manages basic hardware initialization and boot process.
- Cooling Fan Headers – For CPU and case fan connections.
Common Motherboard Sizes (Form Factors):
- ATX – Standard full-sized board.
- Micro-ATX – Smaller, fewer expansion slots.
- Mini-ITX – Very compact, limited slots and features.
If you're building or upgrading a PC, choosing the right motherboard depends on your CPU, desired features, and case size. Want help picking one? Let me know your specs or needs!
Please Contact us 8187925851
Understanding operating system
Understanding an Operating System (OS) involves knowing its purpose, components, and functions. Here's a simplified overview:
What is an Operating System?
An Operating System is system software that acts as an intermediary between computer hardware and the user. It manages hardware resources and provides services for computer programs.
Main Functions of an Operating System:
-
Process Management:
- Manages running applications (called processes)
- Allocates CPU time to each process
- Handles multitasking and process synchronization
-
Memory Management:
- Tracks each byte of memory
- Allocates/deallocates memory space as needed
- Ensures programs do not interfere with each other
-
File System Management:
- Organizes, stores, retrieves, and manages data on storage devices
- Controls access to files and directories
-
Device Management:
- Manages device communication via drivers
- Controls input/output devices (keyboard, mouse, printer, etc.)
-
User Interface:
- Provides a way for users to interact with the computer (CLI or GUI)
-
Security & Access Control:
- Protects data from unauthorized access
- Manages user permissions
Types of Operating Systems:
- Batch OS: Processes batches of jobs with little/no user interaction.
- Time-Sharing OS: Allows multiple users to use the system interactively.
- Distributed OS: Coordinates a group of computers to work as one.
- Real-Time OS (RTOS): Responds to inputs immediately, used in embedded systems.
- Mobile OS: Designed for smartphones and tablets (e.g., Android, iOS).
Examples of Operating Systems:
- Desktop/Server: Windows, Linux, macOS, Unix
- Mobile: Android, iOS
- Embedded/RTOS: FreeRTOS, VxWorks
Monday, May 26, 2025
Understanding operating system
Understanding an Operating System (OS) involves knowing its purpose, components, and functions. Here's a simplified overview:
What is an Operating System?
An Operating System is system software that acts as an intermediary between computer hardware and the user. It manages hardware resources and provides services for computer programs.
Main Functions of an Operating System:
-
Process Management:
- Manages running applications (called processes)
- Allocates CPU time to each process
- Handles multitasking and process synchronization
-
Memory Management:
- Tracks each byte of memory
- Allocates/deallocates memory space as needed
- Ensures programs do not interfere with each other
-
File System Management:
- Organizes, stores, retrieves, and manages data on storage devices
- Controls access to files and directories
-
Device Management:
- Manages device communication via drivers
- Controls input/output devices (keyboard, mouse, printer, etc.)
-
User Interface:
- Provides a way for users to interact with the computer (CLI or GUI)
-
Security & Access Control:
- Protects data from unauthorized access
- Manages user permissions
Types of Operating Systems:
- Batch OS: Processes batches of jobs with little/no user interaction.
- Time-Sharing OS: Allows multiple users to use the system interactively.
- Distributed OS: Coordinates a group of computers to work as one.
- Real-Time OS (RTOS): Responds to inputs immediately, used in embedded systems.
- Mobile OS: Designed for smartphones and tablets (e.g., Android, iOS).
Examples of Operating Systems:
- Desktop/Server: Windows, Linux, macOS, Unix
- Mobile: Android, iOS
- Embedded/RTOS: FreeRTOS, VxWorks
What is BOOTING
What is Booting?
Booting is the process your computer goes through when it's powered on, where it loads the operating system (like Windows, Linux, or macOS) so you can use the machine.
Boot Process (Simplified):
- Power On – You press the power button.
- POST (Power-On Self-Test) – The system checks basic hardware like RAM and CPU.
- BIOS/UEFI Loads – The firmware runs and looks for a bootable device (hard drive, SSD, USB, etc.).
- Bootloader Launches – A small program (like GRUB for Linux or Windows Boot Manager) loads the OS.
- Operating System Starts – The core OS files load into memory, and the login screen appears.
Types of Booting:
- Cold Boot – Turning on a computer from a powered-off state.
- Warm Boot – Restarting the computer without turning it off (e.g., pressing Ctrl+Alt+Del).
- Network Boot – Booting from a server instead of a local drive.
Peripheral device ports
Peripheral device ports are the physical interfaces on a computer or other electronic device that allow you to connect external hardware (peripherals) such as keyboards, mice, printers, storage devices, and more. Here are some common types:
1. USB Ports (Universal Serial Bus)
- Types: USB-A, USB-B, USB-C, Micro-USB, Mini-USB
- Used for: Keyboards, mice, flash drives, external hard drives, smartphones, etc.
2. HDMI (High-Definition Multimedia Interface)
- Used for: Connecting monitors, TVs, projectors for video and audio output.
3. DisplayPort / Mini DisplayPort
- Used for: Video output, similar to HDMI but often used with computer monitors.
4. Audio Jacks (3.5mm, TRS, TRRS)
- Used for: Headphones, microphones, speakers.
5. Ethernet (RJ-45)
- Used for: Wired internet/network connections.
6. Thunderbolt
- Used for: High-speed data transfer, video output, and charging (often uses USB-C connector).
7. VGA (Video Graphics Array)
- Used for: Analog video output (mostly legacy systems).
8. DVI (Digital Visual Interface)
- Used for: Video output to monitors (digital or analog depending on type).
9. SD Card Slot
- Used for: Reading SD cards from cameras, phones, etc.
10. Serial and Parallel Ports (Legacy)
- Used for: Older peripherals like printers and modems.
Measuring unit for memory
The standard measuring units for memory (digital storage) are based on bytes. Here’s a hierarchy of common memory units:
- Bit (b) – The smallest unit, represents 0 or 1.
- Byte (B) – Equals 8 bits.
From there, memory is measured in multiples of bytes:
- Kilobyte (KB) = 1,024 bytes
- Megabyte (MB) = 1,024 KB
- Gigabyte (GB) = 1,024 MB
- Terabyte (TB) = 1,024 GB
- Petabyte (PB) = 1,024 TB
- Exabyte (EB) = 1,024 PB
- Zettabyte (ZB) = 1,024 EB
- Yottabyte (YB) = 1,024 ZB
Note: In some contexts, especially in marketing, 1 KB = 1,000 bytes (decimal system), but in computing, binary measurement (1 KB = 1,024 bytes) is more accurate.
Characteristics of a computer
Here are the main characteristics of a computer:
-
Speed: Computers can process data and perform complex calculations at extremely high speeds, far faster than humans.
-
Accuracy: They perform operations with a high degree of precision and minimal errors (if properly programmed).
-
Automation: Once programmed, computers can operate automatically without human intervention.
-
Storage: Computers can store vast amounts of data and instructions for both short-term and long-term use.
-
Versatility: They can perform a wide range of tasks, from simple calculations to complex simulations.
-
Diligence: Unlike humans, computers do not suffer from fatigue and can work continuously without loss of performance.
-
Multitasking: Computers can handle multiple tasks at the same time through multitasking.
-
Communication: They can share data and resources over networks, enabling communication between different devices and users.
Sunday, May 25, 2025
सूचना एवं संचार प्रौद्योगिकी (Information & Communication Technology – ICT) कौशल
सूचना एवं संचार प्रौद्योगिकी (Information & Communication Technology – ICT) कौशल का अर्थ है ऐसी तकनीकी क्षमताएँ और ज्ञान, जिनकी मदद से व्यक्ति कंप्यूटर, इंटरनेट, मोबाइल, सॉफ्टवेयर व अन्य डिजिटल उपकरणों का प्रभावी उपयोग कर सके।
यहाँ ICT स्किल्स की कुछ प्रमुख श्रेणियाँ दी जा रही हैं:
1. बुनियादी कंप्यूटर ज्ञान
- कंप्यूटर सिस्टम (हार्डवेयर/सॉफ्टवेयर) की समझ
- कीबोर्ड और माउस का उपयोग
- फाइल व फोल्डर प्रबंधन
2. ऑफिस सॉफ्टवेयर का उपयोग
- MS Word या Google Docs में डॉक्यूमेंट बनाना
- MS Excel में डाटा एंट्री व बेसिक फॉर्मूले
- MS PowerPoint द्वारा प्रेजेंटेशन बनाना
3. इंटरनेट का उपयोग
- ब्राउज़र चलाना (जैसे Chrome, Firefox)
- जानकारी खोजना (Google Search)
- ईमेल बनाना और भेजना (जैसे Gmail)
4. डिजिटल संचार कौशल
- वीडियो कॉलिंग (Zoom, Google Meet)
- सोशल मीडिया का प्रभावी उपयोग (WhatsApp, Facebook, LinkedIn)
- ऑनलाइन फॉर्म भरना
5. डिजिटल सुरक्षा
- पासवर्ड प्रबंधन
- साइबर सुरक्षा जागरूकता
- फ़िशिंग और धोखाधड़ी से बचाव
6. क्लाउड टेक्नोलॉजी
- Google Drive, OneDrive जैसे प्लेटफॉर्म पर फाइल अपलोड व शेयर करना
7. मल्टीमीडिया कौशल
- फोटो व वीडियो एडिटिंग के बेसिक टूल्स
- ऑडियो/वीडियो रिकॉर्डिंग
यदि आप किसी विशेष ICT स्किल्स पर विस्तार से जानकारी चाहते हैं या इसे पीडीएफ या स्लाइड के रूप में चाहते हैं, तो बताएं।
Information & communication Technology skills
Information and Communication Technology (ICT) skills refer to the ability to use digital technology, communication tools, and networks to access, manage, create, and communicate information. These skills are essential in nearly every field today. Below is an overview of key ICT skills:
1. Basic ICT Skills
- Using computers and mobile devices
- Operating systems (Windows, macOS, Linux)
- Typing and using keyboards effectively
- Basic troubleshooting
2. Productivity Software Skills
- Word Processing: Microsoft Word, Google Docs
- Spreadsheets: Microsoft Excel, Google Sheets
- Presentations: Microsoft PowerPoint, Google Slides
- Email and Scheduling: Microsoft Outlook, Gmail, Google Calendar
3. Internet and Online Communication
- Browsing and researching online
- Using search engines effectively
- Email communication
- Video conferencing tools (Zoom, Microsoft Teams, Google Meet)
- Social media platforms
4. Data and Information Management
- Organizing digital files and folders
- Using cloud storage (Google Drive, OneDrive, Dropbox)
- Managing data privacy and security
5. Digital Collaboration Tools
- Google Workspace (Docs, Sheets, Meet, etc.)
- Microsoft 365
- Slack, Trello, Asana
6. Multimedia and Content Creation
- Editing photos, videos, and audio (e.g., Canva, Adobe tools)
- Creating blogs or websites (e.g., WordPress, Wix)
7. Cybersecurity Awareness
- Creating strong passwords
- Recognizing phishing scams
- Using antivirus software
- Safe online behavior
8. Programming and Coding (Advanced ICT Skills)
- Knowledge of coding languages (Python, HTML/CSS, JavaScript)
- Understanding software development basics
- Using platforms like GitHub
Saturday, May 24, 2025
Memory in Computer
Memory in a computer refers to the hardware components that store data temporarily or permanently for use by the processor and other system components. It allows the computer to access and use information quickly.
There are two main types of computer memory:
1. Primary Memory (Main Memory)
- Volatile (data is lost when power is off)
- Fast access
- Used by the CPU to run programs and processes.
Examples:
- RAM (Random Access Memory): Temporarily holds data and programs being used.
- Cache Memory: Very fast memory close to the CPU, stores frequently used data.
2. Secondary Memory (Storage)
- Non-volatile (data stays even when power is off)
- Slower than primary memory
- Used for long-term storage.
Examples:
- Hard Drive (HDD)
- Solid-State Drive (SSD)
- USB Flash Drives
- Optical Discs (CD/DVD)
Summary:
Computer memory is essential for storing data and instructions. Primary memory is fast and temporary, while secondary memory is slower but permanent.
What is ROM
ROM stands for Read-Only Memory. It's a type of non-volatile memory used in computers and other electronic devices.
Key Features of ROM:
- Non-volatile: It retains data even when the power is turned off.
- Read-only: Data is written during manufacturing (or in some cases, later), but it typically can't be modified or erased by the user.
- Used to store firmware: This includes software that boots up a device or performs essential low-level operations.
Types of ROM:
- Masked ROM – Programmed during the manufacturing process.
- PROM (Programmable ROM) – Can be programmed once after manufacturing.
- EPROM (Erasable PROM) – Can be erased using UV light and reprogrammed.
- EEPROM (Electrically Erasable PROM) – Can be erased and rewritten electrically.
Common Uses:
- BIOS in PCs
- Embedded systems
- Game cartridges
- Microcontrollers
What is RAM
RAM stands for Random Access Memory. It's a type of computer memory that is used to store data and programs that are currently being used by your device.
Key Points:
- Volatile: RAM only holds data while the device is on. When you turn it off, everything in RAM is lost.
- Fast: RAM is much faster than storage (like hard drives or SSDs), which makes it ideal for temporary tasks.
- Used for:
- Running apps and programs
- Loading operating system functions
- Browsing the internet
- Playing games
Example:
When you open a web browser or a game, it loads into RAM so your computer can access and run it quickly.
More RAM generally means your device can handle more apps at once and run faster.
Computer Number System
A computer number system is a way to represent numbers in a form that computers can understand and process. There are four main types of number systems commonly used in computing:
1. Binary Number System (Base-2)
- Digits Used: 0, 1
- Example: 1011 (Binary for decimal 11)
- Usage: Internal computer processing; all data is represented in binary (on/off, true/false, 1/0)
2. Decimal Number System (Base-10)
- Digits Used: 0 to 9
- Example: 234 (Standard number system we use daily)
- Usage: Human-readable format; used in programming output and input
3. Octal Number System (Base-8)
- Digits Used: 0 to 7
- Example: 17 (Octal for decimal 15)
- Usage: Sometimes used in computing, especially in older systems and Unix file permissions
4. Hexadecimal Number System (Base-16)
- Digits Used: 0 to 9, A (10) to F (15)
- Example: 1A3 (Hex for decimal 419)
- Usage: Used in programming, memory addresses, and color codes in web design
Conversion Between Systems
- Computers often convert numbers between binary, decimal, octal, and hexadecimal for various operations.
- Example: Decimal 255 = Binary 11111111 = Octal 377 = Hex FF
Computer Memory Units
Computer memory is measured using a hierarchy of units that reflect increasing sizes of data. Here are the most common memory units, from smallest to largest:
-
Bit (b) – The smallest unit of data in computing; represents a binary value of 0 or 1.
-
Byte (B) – 8 bits. Represents a single character, such as a letter or number.
-
Kilobyte (KB) – Approximately 1,024 bytes (2¹⁰ bytes).
-
Megabyte (MB) – Approximately 1,024 KB, or 1,048,576 bytes.
-
Gigabyte (GB) – Approximately 1,024 MB, or 1,073,741,824 bytes.
-
Terabyte (TB) – Approximately 1,024 GB, or 1,099,511,627,776 bytes.
-
Petabyte (PB) – Approximately 1,024 TB.
-
Exabyte (EB) – Approximately 1,024 PB.
-
Zettabyte (ZB) – Approximately 1,024 EB.
-
Yottabyte (YB) – Approximately 1,024 ZB.
Friday, May 23, 2025
Learning Microsoft Office Access
Learning Microsoft Office Access involves understanding how to use it as a database management system to store, manage, and analyze data. Here's a structured approach to help you get started:
1. Understand What Access Is
Microsoft Access is a relational database management system (RDBMS) that combines a graphical user interface with software development tools. It allows you to create and manage databases easily.
2. Key Concepts to Learn
- Tables: Where data is stored. Each table should represent one entity (e.g., Customers, Orders).
- Fields: Columns in a table, each representing a data type (text, number, date, etc.).
- Records: Rows in a table, each containing a unique set of data.
- Primary Key: A field (or fields) that uniquely identifies each record.
- Relationships: Connections between tables (e.g., one-to-many).
- Queries: Used to search and retrieve data based on criteria.
- Forms: User-friendly interfaces for entering and viewing data.
- Reports: Used to format, summarize, and present data.
- Macros/VBA: Automate tasks and add functionality.
3. Getting Started with a Simple Project
Try creating a basic database such as a Contact Manager:
- Create a new blank database.
- Add a table named
Contacts. - Define fields like
FirstName,LastName,PhoneNumber, andEmail. - Create a form to input contact information.
- Use queries to search for contacts by name.
- Generate a report listing all contacts.
4. Recommended Learning Resources
-
Microsoft’s Official Access Training:
https://support.microsoft.com/access -
YouTube Tutorials: Search for "Microsoft Access for Beginners".
-
Books:
- Access 2019 Bible by Michael Alexander and Richard Kusleika
- Access For Dummies by Laurie Ulrich Fuller
-
Courses:
5. Practice Ideas
- Inventory Management System
- Student Records Database
- Expense Tracker
- Library Management System
Would you like a guided hands-on tutorial or a sample project to start working with?
Learning Microsoft Excel
Learning Microsoft Excel is a valuable skill. Here's a beginner-friendly roadmap to help you get started:
1. Basics of Excel
- Understand the Interface: Ribbon, cells, rows, columns, worksheets.
- Basic Navigation: Moving between cells, using mouse and keyboard shortcuts.
- Data Entry: Enter text, numbers, and dates into cells.
2. Formatting
- Cell Formatting: Font, color, borders, number formats (currency, percentage, etc.)
- Conditional Formatting: Automatically format cells based on values.
3. Formulas and Functions
- Basic Formulas:
=A1+A2,=B1*B2, etc. - Functions:
SUM(),AVERAGE(),MIN(),MAX()IF(),COUNT(),COUNTA()VLOOKUP(),HLOOKUP(),INDEX(),MATCH()
4. Data Management
- Sorting and Filtering: Organize and analyze data quickly.
- Tables: Turn data ranges into tables for easy manipulation.
- Data Validation: Create dropdown lists and restrict data entry.
5. Charts and Visualization
- Create Charts: Bar, Line, Pie, etc.
- Customize Charts: Titles, axes, labels, and colors.
6. Intermediate Tools
- PivotTables: Summarize large datasets.
- Named Ranges: Simplify formulas and navigation.
- Text Functions:
LEFT(),RIGHT(),MID(),TEXT(),CONCATENATE()
7. Advanced Features (Optional Later On)
- Macros and VBA: Automate repetitive tasks.
- Power Query: Clean and transform data.
- Power Pivot: Advanced data modeling.
Would you like:
- A step-by-step daily study plan?
- A downloadable practice file?
- Or video tutorials recommendation
- Please contact COMPUTER CARE
Learning Microsoft PowerPoint
Learning Microsoft PowerPoint is a great skill for creating professional presentations. Here's a step-by-step guide to help you get started:
Step 1: Understand the Basics
- What is PowerPoint? It's a presentation software used to create slideshows composed of text, images, videos, charts, and animations.
- Interface Overview:
- Ribbon: Toolbar with tabs (Home, Insert, Design, etc.)
- Slides Pane: View all slides in your presentation.
- Slide Area: The main workspace for editing the current slide.
- Notes Pane: Add speaker notes for each slide.
Step 2: Create Your First Presentation
- Open PowerPoint and select Blank Presentation.
- Click on Title Slide and enter your presentation title and subtitle.
- Use New Slide (Home > New Slide) to add more slides.
- Choose different slide layouts (e.g., Title and Content, Two Content, etc.)
Step 3: Add and Format Content
- Text: Click inside text boxes or add new ones via Insert > Text Box.
- Images: Insert > Pictures to add from your device or the web.
- Shapes and Icons: Use Insert > Shapes or Icons.
- Charts: Use Insert > Chart to visualize data.
- Videos & Audio: Use Insert > Video/Audio to embed multimedia.
Step 4: Design and Themes
- Use Design tab to apply professional themes.
- Customize background, fonts, and colors for consistency.
Step 5: Transitions and Animations
- Transitions: Effects between slides. Go to Transitions tab.
- Animations: Effects on text or objects within a slide. Use the Animations tab.
Step 6: Review and Present
- Use Slide Show tab to rehearse timings or start presentation.
- Press F5 to start from beginning, Shift+F5 to start from current slide.
- Use Presenter View for notes and slide previews.
Step 7: Save and Share
- Save as .pptx or export to PDF/video.
- Use File > Share to send by email or upload to OneDrive.
Would you like a practice exercise or a visual tutorial.
Please contact COMPUTER CARE
Learning Microsoft Word
Learning Microsoft Word is a great way to improve your productivity with documents. Here’s a beginner-friendly guide to help you get started:
1. Understanding the Interface
- Ribbon: This is the toolbar at the top, organized into tabs like Home, Insert, Layout, etc.
- Document Area: The large white space where you type.
- Status Bar: At the bottom, showing page number, word count, etc.
2. Basic Tasks
- Creating a New Document: File > New > Blank Document
- Saving a Document: File > Save or Save As (choose location and file type)
- Opening a Document: File > Open (browse your computer or cloud)
3. Formatting Text
- Font Style and Size: Use the Home tab to choose your font and size.
- Bold, Italic, Underline: Found in the Home tab or use shortcuts:
- Ctrl + B (Bold)
- Ctrl + I (Italic)
- Ctrl + U (Underline)
- Text Alignment: Left, Center, Right, Justify (also in Home tab)
4. Working with Paragraphs
- Line Spacing: Home > Paragraph > Line and Paragraph Spacing
- Bullets and Numbering: Easily add lists using bullet or number icons
- Indentation: Increase or decrease indent under the Paragraph section
5. Inserting Elements
- Images: Insert > Pictures
- Tables: Insert > Table
- Page Numbers: Insert > Page Number
- Headers/Footers: Insert > Header or Footer
6. Page Layout
- Margins: Layout > Margins
- Orientation: Layout > Orientation (Portrait or Landscape)
- Size: Layout > Size (e.g., A4, Letter)
7. Proofing Tools
- Spell Check: Review > Spelling & Grammar
- Word Count: Review > Word Count
8. Saving and Sharing
- Save as PDF: File > Save As > Choose "PDF" from the dropdown
- Print: File > Print
- Share: File > Share (email or cloud sharing)
Microsoft Office Basics
Here’s a quick overview of the basics of Microsoft Office, which includes several essential applications:
1. Microsoft Word
- Purpose: Word processing (creating documents, letters, resumes).
- Key Features:
- Text formatting (font, size, color)
- Paragraph alignment
- Inserting images, tables, and charts
- Spell check and grammar correction
- Saving in .docx or PDF format
2. Microsoft Excel
- Purpose: Spreadsheets and data analysis.
- Key Features:
- Entering and formatting data in cells
- Using formulas (e.g., SUM, AVERAGE)
- Creating charts and graphs
- Sorting and filtering data
- PivotTables for summarizing data
3. Microsoft PowerPoint
- Purpose: Creating presentations.
- Key Features:
- Slide design and layout
- Adding text, images, and multimedia
- Animations and transitions
- Presenter view and slide notes
4. Microsoft Outlook
- Purpose: Email and calendar management.
- Key Features:
- Sending and receiving emails
- Organizing contacts
- Scheduling meetings and reminders
- Task management
5. Microsoft OneNote
- Purpose: Digital note-taking.
- Key Features:
- Organizing notes into notebooks, sections, and pages
- Drawing and handwriting support
- Tagging and searching notes
- Audio recording and screen clipping
Would you like a simple tutorial on how to use any of these apps?
Please contact COMPUTER CARE
Microsoft Office
The Microsoft Office package is a suite of productivity applications developed by Microsoft. It typically includes:
Core Applications:
- Microsoft Word – Word processing (documents, reports, etc.)
- Microsoft Excel – Spreadsheets and data analysis
- Microsoft PowerPoint – Presentations
- Microsoft Outlook – Email and calendar
- Microsoft OneNote – Digital note-taking
- Microsoft Access – Database management (PC only)
- Microsoft Publisher – Desktop publishing (PC only)
Versions:
- Microsoft 365 (formerly Office 365): Subscription-based, cloud-enabled, always updated.
- Office 2021: One-time purchase, static version with no feature updates.
Platforms:
- Available for Windows, Mac, Web, iOS, and Android.
- Online version (Office Online) provides free, web-based versions with limited features.
Thursday, May 22, 2025
How Can Make Bootabl Pendrive
To make a bootable pendrive, you can use tools like Rufus (Windows), BalenaEtcher (Windows/macOS/Linux), or the dd command (Linux/macOS). Here's how you can do it step by step:
Method 1: Using Rufus (Windows)
-
Download Rufus:
https://rufus.ie -
Insert your USB drive (at least 8 GB recommended).
-
Open Rufus (no installation needed).
-
Choose Device: Select your USB drive from the "Device" list.
-
Boot Selection: Click "SELECT" and choose the ISO file (e.g., Windows or Linux ISO).
-
Partition scheme: Choose:
- MBR for BIOS or UEFI-CSM.
- GPT for UEFI.
-
Click Start and confirm when prompted. It will format the USB and write the bootable image.
Method 2: Using BalenaEtcher (All platforms)
-
Download BalenaEtcher:
https://www.balena.io/etcher/ -
Insert USB drive.
-
Open Etcher and:
- Select the ISO image.
- Choose your USB drive.
- Click Flash.
-
Wait until it's done. That's it.
Method 3: Using dd command (Linux/macOS)
WARNING: Be very careful with this method, it can wipe your drive.
sudo dd if=/path/to/your.iso of=/dev/sdX bs=4M status=progress && sync
- Replace
/path/to/your.isowith the ISO file path. - Replace
/dev/sdXwith your USB device (e.g.,/dev/sdb).
Double-check withlsblkorfdisk -lto avoid overwriting your main drive.
How Can Install Windows 11
To install Windows 11, follow these steps based on your situation:
1. Check System Requirements
Make sure your PC meets the minimum requirements:
- 64-bit processor with 1GHz or faster, 2+ cores
- 4GB RAM or more
- 64GB storage or more
- UEFI firmware with Secure Boot
- TPM 2.0
- DirectX 12 compatible graphics card
- Internet connection
Check compatibility using the PC Health Check tool.
2. Back Up Your Data
Before installing, back up important files using:
- OneDrive
- External drive
- Cloud storage
3. Choose Installation Method
Option A: Upgrade via Windows Update
- Go to Settings > Update & Security > Windows Update
- If compatible, you’ll see an option to upgrade to Windows 11.
- Click Download and install.
Option B: Install via Installation Assistant
- Download the Windows 11 Installation Assistant from Microsoft's website:
https://www.microsoft.com/software-download/windows11 - Run the tool and follow instructions.
Option C: Clean Install with Bootable USB
- Download the Media Creation Tool from the link above.
- Create a bootable USB (at least 8GB).
- Boot from the USB (change boot order in BIOS/UEFI).
- Follow on-screen instructions for a clean install.
4. Activate Windows
Use your Windows 10/11 product key if prompted, or sign in with your Microsoft account.
Would you like help with a specific method or step? Contact Computer Care
How Can Install Windows 10
To install Windows 10 on a PC or laptop, follow these steps:
Option 1: Clean Install Using a USB Drive (Recommended)
This is useful for a fresh install or if you're replacing an OS.
What you need:
- A USB drive (at least 8 GB).
- A working PC with internet access.
Steps:
-
Download the Media Creation Tool:
- Go to the official Microsoft page: https://www.microsoft.com/software-download/windows10
- Click on "Download tool now".
-
Create Installation Media:
- Plug in the USB drive.
- Run the Media Creation Tool.
- Choose "Create installation media (USB flash drive, DVD, or ISO file) for another PC".
- Select language, edition (Windows 10), and architecture (64-bit or 32-bit).
- Choose USB flash drive and let it create the bootable USB.
-
Install Windows 10:
- Insert the USB into the PC where you want to install Windows.
- Boot into BIOS/UEFI (usually by pressing F2, F12, Delete, or Esc when turning on the PC).
- Set the USB drive as the first boot device.
- Save changes and restart.
-
Follow Installation Steps:
- Choose language, time, and keyboard.
- Click Install Now.
- Enter product key (if you have one; you can skip and activate later).
- Select "Custom: Install Windows only".
- Choose the drive to install Windows on (delete and format partitions if needed).
- Follow on-screen prompts.
Option 2: Upgrade from Windows 7/8
- Use the same Media Creation Tool, but choose "Upgrade this PC now".
- Your files and settings will be kept.
After Installation:
- Connect to the internet.
- Run Windows Update to install drivers and updates.
- Activate Windows using your product key if you skipped earlier.
How can Install Windows 7
Installing Windows 7 involves several steps. Here's a general guide:
What You’ll Need:
- A Windows 7 installation DVD or bootable USB drive.
- A valid Windows 7 product key.
- A PC that meets Windows 7 system requirements.
- Backup of your data (if you're installing over an existing OS).
Steps to Install Windows 7:
1. Prepare Installation Media:
If you have a DVD:
- Insert it into your optical drive.
If you're using a USB:
- Use a tool like Rufus to create a bootable USB from a Windows 7 ISO file.
2. Boot from Installation Media:
- Restart your PC.
- Enter BIOS/UEFI (usually by pressing Del, F2, or F12 during boot).
- Set the boot priority to DVD or USB first.
- Save and exit BIOS.
3. Begin Installation:
- You’ll see “Press any key to boot from CD or DVD...” — press a key.
- Choose your language, time, and keyboard settings. Click Next.
- Click Install now.
4. Accept License and Choose Install Type:
- Accept the license terms.
- Choose Custom (Advanced) for a fresh install.
5. Select Partition:
- Choose where to install Windows.
- You can delete existing partitions to create new ones (be careful — this erases data).
- Select the target partition and click Next.
6. Installation Process:
- Windows will copy files, expand them, install features/updates, and restart a few times.
7. Setup Windows:
- Enter your name, computer name, and password (optional).
- Enter your product key.
- Set time and date settings.
- Choose network settings (Home, Work, or Public).
After Installation:
- Install drivers: Go to your PC or motherboard manufacturer’s website for drivers.
- Activate Windows.
- Install updates via Windows Update.
- Install essential software.
Wednesday, May 21, 2025
Computer Studies Topics
Here are some key Computer Studies topics, categorized by level and subject area:
1. Fundamental Topics (Beginner Level)
-
Introduction to Computers
- History of computers
- Types of computers
- Components (hardware & software)
-
Operating Systems
- Functions of OS
- Types (Windows, Linux, macOS)
-
Computer Hardware
- Input/output devices
- Storage devices
- Central Processing Unit (CPU)
-
Computer Software
- System software vs. application software
- Examples: MS Office, browsers, antivirus
-
Data Representation
- Binary numbers
- ASCII & Unicode
- Data units (bit, byte, KB, MB, etc.)
2. Intermediate Topics
-
Networking
- LAN, WAN, Internet
- Network devices (router, switch, modem)
- IP addresses and DNS
-
Programming Basics
- Algorithms and flowcharts
- Introduction to languages (Python, C++, Java)
- Variables, loops, conditionals
-
Databases
- DBMS vs. RDBMS
- Tables, fields, records
- SQL basics
-
Cybersecurity
- Types of threats (viruses, phishing)
- Safe browsing and data protection
- Password management
3. Advanced Topics
-
Web Development
- HTML, CSS, JavaScript
- Front-end vs. back-end
- Responsive design
-
Software Development Life Cycle (SDLC)
- Stages: planning, design, implementation, testing
- Agile vs. Waterfall
-
Artificial Intelligence & Machine Learning
- AI concepts
- Applications in real life
- Machine learning basics
-
Cloud Computing
- Definition and benefits
- Services: IaaS, PaaS, SaaS
- Providers: AWS, Azure, Google cloud
Social Media Marketing
Social media marketing is the use of social media platforms (like Facebook, Instagram, Twitter/X, LinkedIn, TikTok, and others) to promote products, services, or brands and engage with an audience. It involves strategies and activities aimed at building brand awareness, driving traffic, and generating leads or sales.
Key Components of Social Media Marketing:
-
Strategy Development:
- Define goals (e.g., increase brand awareness, generate leads, boost engagement).
- Identify target audience.
- Choose the right platforms.
-
Content Creation:
- Create engaging content (images, videos, stories, reels, infographics, etc.).
- Maintain a consistent brand voice.
- Plan posts using a content calendar.
-
Community Management:
- Respond to comments and messages.
- Engage with followers and influencers.
- Monitor brand mentions and sentiment.
-
Paid Advertising:
- Use platform ad tools (e.g., Facebook Ads, Instagram Ads).
- Set budgets, target audiences, and ad formats.
- Track and optimize ad performance.
-
Analytics and Reporting:
- Track KPIs like engagement rate, reach, clicks, and conversions.
- Use tools like Meta Insights, Google Analytics, or third-party apps.
- Adjust strategies based on data.
-
Trends and Adaptation:
- Stay updated with platform algorithm changes and content trends.
- Use trending hashtags and formats to improve reach.
Would you like help building a strategy, managing accounts, creating content ideas, or running ads?
Coral DRAW Tutorial for Beginners
CorelDRAW is a vector graphic design software used for creating logos, illustrations, page layouts, and more. Here's a beginner-friendly tutorial to get you started:
CorelDRAW Tutorial for Beginners
1. Getting Started
- Launch CorelDRAW: Open the program and select New Document.
- Set Up Your Page: Choose your page size, orientation, and resolution.
2. Core Tools Overview
- Pick Tool: Select and move objects.
- Shape Tool: Edit shapes and curves.
- Crop Tool: Trim parts of your design.
- Zoom Tool: Zoom in/out on your canvas.
- Freehand Tool: Draw free-form lines.
3. Drawing Shapes
- Use the Rectangle Tool, Ellipse Tool, and Polygon Tool from the toolbox.
- Hold Ctrl to draw perfect squares or circles.
4. Working with Text
- Click the Text Tool (A) and type anywhere.
- Use the top property bar to change font, size, alignment, etc.
- Convert text to curves: Right-click > Convert to Curves (for more advanced editing).
5. Coloring and Fills
- Use the Color Palette on the right.
- Fill Tool: Add solid, gradient, or pattern fills.
- Outline Tool: Change the color or thickness of outlines.
6. Layers and Objects
- Use Object Manager (Window > Dockers > Objects) to manage layers.
- Arrange objects: Right-click > Order (to send backward or bring forward).
7. Exporting
- Go to File > Export.
- Choose format (JPG, PNG, PDF, etc.) and resolution.
Tuesday, May 20, 2025
Digital marketing Concept
Digital marketing refers to the use of digital channels, platforms, and technologies to promote products or services to consumers. It encompasses a wide range of strategies and techniques aimed at reaching audiences online and through digital devices.
Key Components of Digital Marketing:
-
Search Engine Optimization (SEO):
- Improving website visibility in search engine results to attract organic (unpaid) traffic.
-
Search Engine Marketing (SEM):
- Using paid advertising (like Google Ads) to appear in search results.
-
Content Marketing:
- Creating valuable content (blogs, videos, infographics) to attract and engage a target audience.
-
Social Media Marketing:
- Promoting content and interacting with users on platforms like Facebook, Instagram, X (Twitter), LinkedIn, etc.
-
Email Marketing:
- Sending targeted messages or newsletters to a subscriber list.
-
Affiliate Marketing:
- Partnering with other websites or influencers to promote products in exchange for a commission.
-
Influencer Marketing:
- Collaborating with social media influencers to promote products or services.
-
Mobile Marketing:
- Reaching audiences via smartphones through apps, SMS, or mobile-optimized websites.
-
Analytics and Data:
- Measuring performance and user behavior using tools like Google Analytics to optimize marketing efforts.
Would you like a guide on how to get started, trends for 2025, or help with a specific digital marketing strategy?
How can make LAN Cable
To make a LAN (Ethernet) cable, you'll need some tools and components. Here's a step-by-step guide for making a Cat5e or Cat6 Ethernet cable with RJ45 connectors:
What You Need:
- Ethernet cable (Cat5e, Cat6, etc.)
- RJ45 connectors (8P8C plugs)
- Crimping tool
- Cable stripper or utility knife
- Cable tester (optional, for testing after crimping)
Wiring Standards:
There are two common wiring standards:
- T568A
- T568B (most commonly used)


T568B Color Order (from pin 1 to 8):
- White-Orange
- Orange
- White-Green
- Blue
- White-Blue
- Green
- White-Brown
- Brown
Steps to Make the Cable:
-
Cut the Cable to the desired length.
-
Strip the Outer Jacket
- Use the cable stripper to remove about 1 inch (2.5 cm) of the outer insulation.
- Be careful not to cut the inner wires.
-
Untwist the Wire Pairs and straighten them.
-
Arrange the Wires in the correct color order (T568B is recommended).
-
Trim the Wires Evenly to about 1/2 inch (1.3 cm) in length.
-
Insert Wires into the RJ45 Connector
- Make sure the clip is facing down.
- Each wire should slide into its channel inside the plug.
-
Crimp the Connector
- Insert the connector into the crimping tool and squeeze firmly.
-
Repeat on the Other End
- Use the same wiring standard (usually T568B) unless you are making a crossover cable.
-
Test the Cable
- Use a cable tester to ensure all connections are correct.
Subscribe to:
Comments (Atom)
Computer Care
पायथन सीखने की स्टेप बाय स्टेप गाइड (हिंदी में)
पायथन सीखने की स्टेप बाय स्टेप गाइड (हिंदी में) आज के डिजिटल युग में Python Programming Language सबसे लोकप्रिय और आसान प्रोग्रामिंग भाषाओं...

-
Information and Communication Technology (ICT) skills refer to the ability to use digital technology, communication tools, and networks to ...
-
Networking and Network Types , covering the concept, importance, and various types of networks. Networking and Network Types Introduction...
-
Installing Windows 7 involves several steps. Here's a general guide: What You’ll Need: A Windows 7 installation DVD or bootable USB...
